Thursday 25 May 2017

Adrià's Language Portfolio

Language biography:

My name is Adrià Lapuente Roca, I am twenty-one years old and I was born and raised in Valencia. My parents share origin with me but have different mother tongues, so at home my eighteen-year-old brother and me speak Catalan with my mum and between us, and Castilian with my dad.

Moreover, I attended Escola La Masia, an only-Catalan speaking school which developed my Catalan skills for fourteen years. This also made me use Catalan as a L1 with my friends

Monday 22 May 2017

Marta's Language Portfolio


For sure, there is not a better way to introduce me as a future english teacher than sharing with you my language portfolio in which you can know more about my relationship with languages.


Language biography:

My name is Marta Ruiz and I am twenty years old. I was born in Vila-real, a little city next to Castellón, where I spent all my childhood and adolescense. My parents were not born in the Valencian region so they always speak spanish at home, because my father and grandparents are from Jaén, in Andalucia, and my mother's family are from teruel, Aragón. So I speak Spanish as a target language.

I can also speak Valencian but I don't have the same competences as in Spanish because I only speak this language at school, but not with family nor with friends. And because of me not speaking Valencian at home, my parents have always wanted me to learn it at school.

Sunday 21 May 2017

Circle Games

Circle games are a great way to encourage the whole class to work together. They also provide an often welcome change in working pattern. They are mostly used with young learners, but teenagers will play them and so will the right kind of adult class: one that doesn't take itself too seriously.

What are Circle Games?

Circle games - methodology article Circle games are any games or activity that involve the whole class, sitting in a circle. Many of the games recycle vocabulary and involve an element of fun. We would like to outline a selection of our favourite circle games that can be used in young learner and adult classes. Some of the ideas were given to us by colleagues or they are classic children's party games which have been adapted to the English language classroom.

What’s My Problem?

This is a brilliant EFL game to practice giving advice. It should be played after the ‘giving advice’ vocabulary lesson has taken place. It is a great way for students to see what they have remembered and what needs reviewing. This game works well with any age group, just adapt it to fit the age you’re working with.
  • Why use it? Speaking and Listening; Giving Advice
  • Who it's best for: All ages and levels

How to play:

  1. Write ailments or problems related to your most recent lesson on post-it notes and stick one post-it note on each student’s back.
  2. The students must mingle and ask for advice from other students to solve their problem.
  3. Students should be able to guess their problem based on the advice they get from their peers.
  4. Use more complicated or obscure problems to make the game more interesting for older students. For lower levels and younger students, announce a category or reference a recent lesson, like "Health", to help them along.

Hot Seat

This is one of the students’ favorite games. Hot Seat allows students to build their vocabulary and encourages competition in the classroom. They are also able to practice their speaking and listening skills and it can be used for any level of learner.
  • Why use it? Vocabulary; Speaking and Listening
  • Who it's best for: All ages and levels

How to play:

  1. Split the class into 2 teams, or more if you have a large class.
  2. Elect one person from each team to sit in the Hot Seat, facing the classroom with the board behind them.
  3. Write a word on the board. One of the team members of the student in the hot seat must help the student guess the word by describing it. They have a limited amount of time and cannot say, spell or draw the word.
  4. Continue until each team member has described a word to the student in the Hot Seat.

Reinventing Writing: The 9 Tools That Are Changing Writing, Teaching, and Learning Forever


In this much-anticipated book from acclaimed blogger Vicki Davis (Cool Cat Teacher), you’ll learn the key shifts in writing instruction necessary to move students forward in today’s world. Vicki describes how the elements of traditional writing are being reinvented with cloud-based tools.

Invent To Learn: Making, Tinkering, and Engineering in the Classroom


There’s a technological and creative revolution underway. Amazing new tools, materials and skills turn us all into makers. Using technology to make, repair or customize the things we need brings engineering, design and computer science to the masses. Fortunately for educators, this maker movement overlaps with the natural inclinations of children and the power of learning by doing.

Total Participation Techniques: Making Every Student an Active Learner

Providing easy-to-use alternatives to the stand and deliver approach to teaching that causes so many students to tune out–or even drop out–Total Participation Techniques presents dozens of ways to engage K 12 students in active learning and allow them to demonstrate the depth of their knowledge and understanding.

Flip Your Classroom: Reach Every Student in Every Class Every Day


It started with a simple observation: students need their teachers present to answer questions or to provide help if they get stuck on an assignment; they don’t need their teachers present to listen to a lecture or review content. From there, authors Jonathan Bergmann and Aaron Sams began the flipped classroom.

Creating Innovators: The Making of Young People Who Will Change the World


In this groundbreaking book, education expert Tony Wagner provides a powerful rationale for developing an innovation-driven economy. He explores what parents, teachers, and employers must do to develop the capacities of young people to become innovators.

The Relevant Educator: How Connectedness Empowers Learning


This information-packed resource from digital experts Anderson and Whitby makes it easy to build a thriving professional network using social media. Easy-to-implement ideas, essential tools, and real-life vignettes help teachers learn to: Find and choose the best social media tools, products, and communities. Start and grow a collaborative, high-quality PLN using Twitter, blogging, LinkedIn, and more.

The Way They Learn


Draw out the best in your children—by understanding the way they learn. If you’re frustrated that your child isn’t learning the way you did, chances are they are too! In this practical resource, Cynthia Ulrich Tobias explains that understanding how you both learn can make all the difference.

Awesome free education resources for teachers and students

1. GoConqr

If we’re starting off with the most awesome education resource, then we’ve got to put our own offering top of the list – but then we’re somewhat biased! Of course there are plenty of educational resources out there that offer similar things to GoConqr: some let you can create learning resources such as Mind Maps or Quizzes. Some will let you find great content. But what sets GoConqr apart is that you it brings creativity, discovery and collaboration together on a single platform (that’s available as an app too), for free. Click here to sign up and start creating now.

Expert Note-taking Advice

A big part of our exploration into study notes strategies involved gathering advice from the people who know what works best. We talked to a variety of people in education including teachers, consultants and tech specialists to gain an insight into their expertise so you can create study notes that work for you.

Read a summary of the main points below:

1. Don’t Take Down Every Piece of Information: Most experts we talked to reiterated this piece of advice so it’s definitely valuable to know. Focusing on recording your class notes means that you’re not fully listening and absorbing new information. The more you engage in note-taking, the more you will understand how to take ‘bites’ of information in your own words without breaking your wrist!

How to Survive Final Exams

 Developing a positive mindset can act as motivational boosters and fight exam stress. There are ways you can encourage your brain to adopt this attitude to help you produce outstanding exam results:

1. Plan your Success Strategy

The final examinations are condensed into a few weeks. Once you start, it’s difficult to structure your preparation time. It’s crucial that you have a study schedule planned previously, bearing in mind the time you have available as well as the subjects you need to study.

‘Testing Effect’: How self-testing helps memory improvement

The word ‘test’ alone is probably enough to strike fear into the heart of even the most nerveless of students. Yet research shows that tests can help improve our long-term memory and our ability to retrieve important information when we need it.


We all have our own study strategies, with specific habits, quirks and routines that we feel work best for us. But there is a mounting body of evidence to suggest that the traditional approach to learning may not be as effective as we once believed. In fact, if you find yourself reading until your eyes are almost ready to pop out of their sockets as you approach exam time, then it’s likely you’re doing things wrong.

THE PEOPLE VS THE SCHOOL SYSTEM

How do YOU think we can create a better future of learning? Watch this video which incites reflection. A really recommended video:


Recipes

This is a funny and delicious activity! Students will have to write a recipe that they love the most with the help of his parents. Then, once a week, one student (each week a different student) will bring the recipe to explain it to their mates and he or she will write it on the blackboard. The rest of the students will copy the recipe in their notebooks to have them for cooking it at home if they have like it. Furthermore, they will be able to bring the tasting plate so that the rest of the class can taste it.

This activity reinforces the writing; they learn the structure of the recipe, and vocabulary related to the kitchen too.
It is also a good way to concern about good healthy habits.


Project


  1. 1st lesson. Put students into groups and explain that over the next X weeks/lessons they are going to be involved in a project. Give the groups 6 minutes to brainstorm project ideas and then two minutes to vote/choose which project their group will do. (Alternatively, ask students to think of projects on their own and then form groups where all the students have similar ideas).

  1. 2nd (and subsequent lessons). Devote a section of the lesson (from 10 minutes upwards) to the groups discussing their project. During this time they can set tasks for themselves, and each other, that can be done outside the class, discuss progress, exchange information, and so on.

Note: It is important to have an outcome and time limit for the project. i.e. In 10 lessons time you will ‘present’ your project to the rest of the class.

This type of project work is extremely motivating for many learners, especially those studying at school where classes are levelled by age, not ability.

The Question Box

  1. 1st lesson. Ask students to write down three questions (you could limit the focus or allow the questions to be about anything) that they would like answered. If you want, this can be done for homework. Put all the questions in a box.
  2. 2nd (and subsequent lessons). Put students in groups and ask each group to pick a question from the box. In their groups they should discuss the question (you might want to set a time limit. e.g. 10 minutes) before reporting back to the class. If there is one question of particular interest you might want the class to spend more time on it.
 
NOTE: If there are some questions that they cannot answer, they can search information about it on the Internet before they start to discuss in groups.

Saturday 20 May 2017

Guidance and teaching materials to ensure learners with autism are included in the classroom

Tens of millions of people across the globe have autism, a developmental disability that affects social interaction, communication and behaviour in a variety of different ways.

Autism Awareness Day (2 April) was established by the UN with the dual purpose of raising the profile of the spectrum condition and bringing autism organisations together to collaborate on research, diagnosis and treatment.

Dedicated days, such as this one, are the perfect opportunity for you to review your approach to teaching. We’ve compiled a selection of resources to help you understand how autism can affect pupils’ learning and offer up some ideas to help you support them in the classroom. 

Tips for teachers :

Understanding autism

Explore the reality of life for pupils with autism in a secondary school environment from the perspective of students, parents and experts in this short video.

Top tips poster

Print and display this colourful poster, outlining a number of key strategies to support students with autism.

Autism resource pack

Use this comprehensive pack, including lesson ideas and resource lists for teachers of all age groups, to discover how autism can affect pupils’ learning and hints on how to help.

Peer support workbook

Encourage students to be a better friend to classmates with autism by working through this informative booklet, which highlights the positive aspects of the disability.

Autism-friendly classrooms guide

Including a handy guide, strategy bank and visual task cards, this resource pack contains clear advice on how to adapt your classroom to cater for the needs of all learners. 

Resources for pupils

Visual timetable cards for primary and secondary

Help students with autism get organised with these cards, which can be used to support communication, language development and information processing.

Circle time mood dice

These editable dice are a great way to encourage learners with autism recognise and start talking about their own feelings, as well as understand those of others.

Social story plan template

Help prepare pupils for new experiences and prevent extreme reactions to change with this guided writing template, helping to break down typical social situations.

Autism heroes presentation

Show how autism need not be a barrier to achieving great things with this presentation, including examples of scientists, actors and sports personalities who are on the spectrum.

Conversation skills lesson

Practise some of the basic skills associated with having meaningful conversations using this lesson activity, including a fully-resourced game and assessment questions.

César Bona: "Children have a great deal to say and to offer; they have to be included"


The only Spanish candidate for best teacher in the world makes every one of his classes special.
He teaches at a school in Zaragoza and he makes his pupils feel that they are important. He is one of these teachers who gives little homework and barely uses text books. Teaching in his classroom is dynamic, interactive and even fun. He was one of 38 teachers from all over the world - and the only one from Spain - who took part in the recent Global Teacher Prize, a type of Nobel Prize for teachers, which was won by a female teacher from Maine, in the USA, Nancie Atwell. Last week, César Bona held a conference in Malaga as the guest of the Club de la Infancia.

Prepositions

Hello!
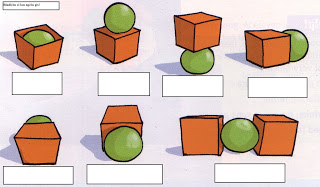
Here you have some resources about prepositions in English class. Here two pictures about it and a song. One to complete the gaps:


Classroom Management Tips for Primary Grades

If you have ever been in an elementary school classroom, then you know that using classroom management to teach this age group can really test your patience. If you are a parent of even one young child in this age range, then you know how difficult it can be to deal with them. Now close your eyes and imagine that you are alone all day long with about 20 of these young children. Do you feel like ripping your hair out yet? All jokes aside, children at this age are really sweet, but also can be quite needy, distracted, and full of energy, all of which can make for a tough day.  However, if you were to ask a veteran teacher how they have stayed in the field for so long, many would probably say because they have figured out a few classroom management strategies to help get them by throughout the years. Here are a few of their classroom management tips. 


Classroom Management: Show No Fear

Children can literally smell fear from a mile away. If they enter your classroom and know that you are scared, then they will take full advantage of that fear. If you are new to the job and are feeling anxious, then go by the motto of “Fake it until you make it.” Put on a fearless face and pretend that you are not scared of anything and that you are in complete control. By presenting a tough exterior (not too tough, though -- you still want to come off as likeable), then you will have the students right where you want them.

Teaching Strategies: Three Models of Inclusion

Blended: 

A blended learning environment is a traditional learning setting merged with technology. In addition to the non-tech lessons and activities common in classrooms, various technology tools are utilized to supplement instruction, engage learners, and monitor data. This model is especially useful for inclusive environments as students with a variety of learning needs can have better individualized and supported learning experiences with the aid of technology.

Itinerant: 

The itinerant model features a traveling specialist, usually a certified teacher who is also trained to supplement student learning in specialized areas. The itinerant teacher is not the regular classroom teacher, but rather a supportive professional who often visits or assists in multiple classrooms. Often instead of teaching students specific content, they focus on metacognitive skills that help students – especially special education students who benefit from inclusive supports – “Learn how to learn.” Itinerant teachers often serve as consultants for teachers who want to learn more about supporting children with learning disabilities.

Team Teaching: 

The team teaching model pairs two (or more, but usually two) teachers together to cooperatively teach a class. The typical team includes one teacher who specializes in content (such as an English or math teacher) and a special education teacher. Together, the teachers utilize their skills and focuses to ensure that all students receive a quality education and special education students have appropriate accommodations in place to best support their learning in the mainstream setting.

10 Classroom Activities to Promote Creativity

Creativity has been said to be a natural ability, a personality trait, something that you must be born with. So when it comes to classroom activities that promote creativity, many teachers feel that it is something that cannot be taught. However, some people believe that creativity is a skill that can be learned. There are a few strategies and classroom activities that you can do as a teacher to promote and encourage creativity in your classroom. Here are 10 classroom activities to try out.


Today I Made a Difference: A Collection of Inspirational Stories from America’s Top Educators


Everyone remembers that teacher who made a difference. The one who went the extra mile to truly affect lives, whose lessons carried as much importance outside the classroom as inside. This book is a celebration of those teachers who continue to make an impact. A collection of stories from some of the country’s top educators, this book is a celebration of teachers’ work, and motivation for them to continue. Joseph Underwood has collected stories from each of the twenty-eight 2004 Disney Teacher™ of the Year honorees. And every story celebrates a different obstacle they overcame, the power and know-how needed to triumph, and the reward granted upon beating the odds. It’s the perfect gift for anyone in or considering the profession. This collection is sure to inspire, celebrate, and motivate those people who make the biggest difference in everyone’s life
 

What If There Were No Teachers


It's time to tell teachers just how valuable and appreciated we really are!

Everyone knows that teachers are overworked and underpaid. Too often even the students they teach don't understand the effort that is put into each class period. What If There Were No Teachers? uses illustrations on the order of Norman Rockwell to let teachers everywhere know that we couldn't live without them.


How to Motivate Students: Top 11 Ways

1. Praise Students in Ways Big and Small

Recognize work in class, display good work in the classroom and send positive notes home to parents, hold weekly awards in your classroom, organize academic pep rallies to honor the honor roll, and even sponsor a Teacher Shoutout section in the student newspaper to acknowledge student’s hard work. 

2. Expect Excellence

Set high, yet realistic expectations. Make sure to voice those expectations. Set short terms goals and celebrate when they are achieved.

5 Skills Children Should Be Taught in School

Children need guidance to perform better in school and they also need it to deal with social situations that the curriculum does not cover. We often expect children to become better and to make the right decisions but we overlook the fact that they receive misleading information from their surroundings and the media, where they might not have the best role models and develop bad behaviours and bad habits.

 Confidence Skills

Confident children will be excellent negotiators and great sales experts. Who does not need sales skills? Probably about everyone if we are honest. Children will need sales in order to apply for jobs, they will need to pitch their skills to an employer and they will need sales for business meetings. Confident children work harder to achieve their goals and they are resilient.

Experiment with Magnetism: Make a Hanging Compass

Try this simple activity at class. Your children will create a homemade working compass using just a steel needle, magnet, jar, and a few other supplies. As they build their compass, they'll experiment with magnetism and will get to "see" the Earth's magnetic field as it influences the compass's needle. Doing science experiments in school and at home is a good way to observe scientific laws at work and helps deepen your children's understanding of scientific concepts.

What You Need:

  • Clear wide-mouthed glass jar or plastic cup
  • Pencil
  • String
  • Large steel sewing needle
  • Smaller steel needles
  • Magnet

What You Do:

  1. Carefully rub the pointed end of the needle on one end of the magnet 30 to 50 times. This will align the electrons in the needle, magnetizing it.
  2. To test that the large needle is magnetized, place one of the smaller steel needles on the tabletop. Have your children try to pick up the small needle with the large one. If it works, the large needle is magnetized. If it doesn't work, repeat step 1, making sure to rub in only one direction to keep from mis-aligning the electrons.
  3. Once the needle is magnetized, have your children knot one end of a piece of string around the middle of the large needle. Adjust the placement of the knot so that the needle hangs level from the string.
  4. Have your children knot the other end of the string around the middle of the pencil.
  5. Have your children lay the pencil across the mouth of the jar or cup so that the needle is hanging inside. Shorten the string if the needle is touching the bottom of the jar. The needle will now turn to point to magnetic North.
  6. Watch as the needle turns to point to magnetic North. You've created a compass!

Understanding Volume

Teach your children about volume and mass with this hands-on activity. Ask her who she thinks has the "biggest" fist in the family. Looks can be deceiving! She'll be learning about these important scientific concepts and what it means to measure for volume, rather than size.

What You Need:

  • Bowl large enough for fists
  • Paper tape
  • Erasable marker

What You Do:

  1. Have your children fill the bowl halfway with water and mark the water level with the marker.
  2. Ask her to make a fist and put it in the bowl of water. Mark the new water level to indicate how much the water has risen. The space between the first and second mark represents the volume of your children's hand.
  3. Have all the members of the family put their fists in the bowl of water, marking the water each time. Whoever displaces the most water has the biggest fist!

Play "I Caught You!" An Early Reading Game

What You Need:

  • Variety of books

What You Do:

  1. Tell your children that you are going to play a reading game together called “I Caught You.” Instruct your children to call out “I caught you!” when you read the wrong word.
  2. Start reading the book as quickly as you can, with your children sitting next to you looking at the words.
  3. Randomly say a different word instead of the one in the story. This first time, choose an obvious word if possible. For example, you might say, “The first bowl of porridge was too hot. The second bowl of porridge was too cucumber.” Do not stress the incorrect word.
  4. When your children say “I caught you!” congratulate her. Then explain that it’s her turn to read, and that she should eventually read the wrong word on purpose so that you can try to catch her.
  5. Repeat this game several times, switching roles each time one of you “catches” the other.
  6. Challenge your children by adding the rule that you can only say “I caught you” before the other person reads the next word. If the person reading has already read the next word, you have to wait until the next incorrect word to say “I caught you” and get your turn.
Your children may even enjoy playing this game with friends who are on a similar reading level. Make sure to emphasize that the goal is to have fun, not just to “catch” the other person’s mistakes!

Do Plants Breathe?

What You Need:

  • Zippered plastic bags
  • Access to a variety of plants
  • A sunny day 

What You Do:

  1. Find several plants that you can use for your experiment. Try to select a variety of plants such as a vine, a shrub or tree and an herb or flower. You can also choose a plant with red leaves vs green leaves or select plants with leaves of different sizes. Remember, you are not picking the plant or removing any of its leaves so choose something that you can slip a bag over without damaging the plant.
  2. Working with your first plant, place your bag over the plant, or a portion of the plant, and zip the bag as far closed as possible without damaging the plant. You won’t be able to close the bag completely, but that’s okay.
  3. Repeat Step 2 with several more plants.
  4. Come back in 20 or 30 minutes. What do you see? If you don’t see anything, wait for another 20 or 30 minutes. This step can take different lengths of time depending on the type of plant and the temperature outside. The droplets condensed inside the bag are water—evidence of the plant's respiration process!
Expand on this activity by repeating it at different times throughout the year. Do you get the same results in the fall? How about during the winter? In winter weather, many plants die while others go dormant. Does a dormant plant's respiration process still generate water vapor? Experiment to find the answer.

Extract DNA from Spinach!

What You Need:

  • Rubbing alcohol
  • Blender
  • Timer
  • 1/2 cup fresh spinach
  • 2 tablespoons dish washing soap
  • Pinch of meat tenderizer
  • Strainer
  • 1 cup cold water
  • 1/4 teaspoon salt
  • Clear glass measuring cup

What You Do:

  1. Have your children blend the water, salt, and spinach together in the blender at a high speed until she has created a "soupy" mixture.
  2. Help her pour the concoction through a strainer into the glass measuring cup. Ask her to add the dish washing soap and set a timer for ten minutes.
  3. Invite your children to add a pinch of meat tenderizer to the mixture; she should combine it slowly and completely.
  4. Observe and discuss the present state of the mixture. How much volume is in the cup now? Have your children very carefully add exactly that amount of rubbing alcohol.
  5. Ask your children to set the timer for three minutes. What does she see in the cup? If there is a white cobwebby substance, that's DNA! You will also notice that the mixture becomes somewhat murky.
What's going on? What made the DNA appear? By completely blending the spinach, your children broke the substance down to its simplest cellular structure. The soap helped to further access the DNA, and the alcohol made the strands adhere to each other. Voilà! Feel free to preserve the DNA "soup" as long as your
children would like!
Please Note: This activity could make for a great jumping off point for a science fair activity, however, it's more of a basic science activity to do for fun, than it is a study in the scientific method.

Water Pollution: Can You See It?

What You Need:

  • 4 large, clean jars
  • 4-5 large, wide-mouth jars
  • Masking tape
  • Cone-shaped paper coffee filters
  • Magnifying glass

What You Do:

  1. Using the four large jars, collect samples of water from four difference sources. Good sources to use might be tap water, bottled water, rain water, or water from creeks, ponds, rivers, or even the ocean.
  2. Using the masking tape and a marker, label each jar so that you will be able to easily identify the source of the water.
  3. Fit the coffee filters just inside the mouths of the large, wide-mouthed jars. Take one of the water samples, and slowly pour the water through the filter into the other jar. Repeat for each water sample. Don't forget to label the filters and new jars, so they don't get mixed up.
  4. Open each filter and examine it through the magnifying glass. Discuss the filters with your children. Which filter is the most discolored? Which filter caught the most particles? Did any of the samples leave a colored residue on the filter?
  5. Discuss with your children how the water in rivers, streams and ponds can become polluted. Where do pollutants come from? (A major cause of water pollution is due to the chemicals and dyes that factories release into rivers. Individuals who drop litter in water sources like rivers, streams, or creeks, also contribute to water pollution.)
Extension Activity:
Help your children understand that water can be polluted even if the pollution is not dramatically visible.
What You Need:
  • Large, clear container
  • Cup
  • Red food coloring
  • Water
What You Do:
  1. Pour one cupful of water into the large container.
  2. "Pollute” this water by adding a little red food coloring.
  3. Add water, one cupful at a time, until the water looks clear.
  4. Discuss the implications of this demonstration with your children. Assist him in making connections between this experiment and the real world. Some questions to think about are: Can we see the dye? Is the dye still in the water? If people were to drink from this water, would they also drink the dye? What would happen if the dye was poisonous or dangerous?

Bean Sprout Science

How do flowers bloom? When springtime arrives, your third grader might wonder why there are so many new flowers and plants. This awesome hands-on science activity addresses your young learner's questions! He'll get to observe the life of a bean sprout seed and see what happens when it is properly fed and sheltered. 

What You Need:

  • Water
  • Paper and pencil
  • Paper towels
  • Baking sheet
  • 3 types of bean seeds (mung, green, lima)

What You Do:

  1. Give one of each bean to your children to observe, explaining that each bean has a little opening for water to go inside.
  2. Have your little scientist lay a few stacked damp paper towels onto the baking sheet, and put the beans on top. Put a few more stacked damp paper towels on top of the beans. Set the baking sheet aside in a sunny place. Make sure this spot isn't too sunny, so the beans might get scorched.
  3. Ask your children to write down some thoughts on a piece of paper. Have him predict the life cycle of a bean. How long will it take for it to fully sprout?
  4. Each day, have your children re-wet the paper towels. Has anything changed in the beans?
  5. At the end of a week, your scientist's beans will have likely sprouted! Otherwise, wait and keep observing.
  6. When the beans have sprouted, ask your children about the little plants. Ask him what the purpose of a hard exterior is, what the seed needed to grow, and how plants outside grow.
  7. You can take this fun project a little further and plant the seeds outside!

Make an ALL ABOUT ME! Book

Kids love talking about themselves—their likes, their dislikes, and details about everything in between. Spark their interest in writing with a mini-book about their favorite subject…themselves! By incorporating a popular theme in first grade, the five senses, you’ll help them to expand their story with descriptive words and phrases—a great way to sneak in some vocabulary practice as well! 

What You Need:

  • Construction paper
  • Pencil
  • Crayons, markers, or other art supplies

What You Do:

  1. Most great artists have attempted at least one self-portrait. Let your children take up the torch! On construction paper or any paper he’d like, have him illustrate a picture of himself.  Let him know it should be as detailed as he can make it.
  2. Discuss the completed picture, asking questions related to the five senses. For example, “What color are your eyes?” or “How many ears do you have?” or “What part of your body do you smell with?” 
  3. Now have your children tell you about himself.  Remind him to include details from the picture and use his five senses in the description.  For each of the five senses, ask him to write down a few phrases. He can use the following sentences as a guide and fill in the blanks (if he’s a more beginner writer), or create his own sentences from scratch. Each sense should get its own page so that you’ll have 6 total pages in the end.
SAMPLE SENTENCES FOR FILL-IN-THE-BLANK BOOKS:
I love to look at _____.
____ smells delicious to me. ____ does not. 
If I could listen to anything in the world, it would be _____.
Touching _____ makes me feel _____.
The best tastes on the planet are _____, ______, and ______.

Writing done? Bind the book and get reading! And if you’re feeling industrious, laminate the masterpiece at your local copy store: you might be surprised ten years down the road to remember his favorite smells were mowed grass and dirty socks!

Observe the Greenhouse Effect in a Jar

This experiment gets kids exploring how a greenhouse works, and in turn how greenhouse gases affect the Earth's atmosphere. Your children will strengthen observation and recording skills, work with a control, and draw conclusions. And bonus: this is a great outdoor activity!

What You Need:

  • Two thermometers
  • A notebook
  • Pencil or pen
  • A clear container, such as a jar
  • Watch or clock
  • A sunny area, either outside or inside

What You Do:

  1. Lay the thermometers in direct sunlight. Let them sit in the sun for three minutes.
  2. Open up a page of the notebook and draw two columns, one labeled "Thermometer A" and one labeled "Thermometer B."
  3. After the three minutes have passed, read and record the time and thermometer temperatures in the notebook.
  4. Place one of the thermometers in the jar or container and seal. Make sure the lid doesn't cast a shadow on either thermometer!
  5. Record the temperature of the thermometers every minute for ten minutes.
  6. Discuss how the container affected the temperature of thermometers. How did the temperature inside the container change compared to outside the container?
What's Going On?   
The thermometer outside of the container is constantly being exposed to air that is constantly changing temperature, as the warm air mixes with passing cooler air. The air inside the container is trapped and can't mix with the cooler surrounding air–it just gets warmer as the sunlight heats it up. A greenhouse works in a similar way; solar energy in the form of light creates thermal energy, or heat, that can't escape through the glass.
This activity mirrors how a greenhouse works, but it's not exactly the same as the greenhouse effect that is taking place in the Earth's atmosphere. A complex interaction between light, heat, and chemicals make up the greenhouse effect and the chemicals known as "greenhouse gases" in the environment. They cause the temperature of the Earth to be warmer than it would be without them, much like the glass in a greenhouse, or the jar in this activity.
Did you know?
Some greenhouse gases are actually helpful and natural–they keep the Earth's surface from getting too cold. In fact, without some greenhouse gases, the humans would regularly experience temperatures as low as zero degrees Fahrenheit, or -18 degrees Celsius. The problem comes when pollution caused by human industrialization creates additional greenhouse gases, such as carbon dioxide. Excess greenhouse gases in the atmosphere increase the overall temperature of the earth and disrupt the natural balance of the Earth.

Pollution Experiment


In today’s world we make it a point to raise our children to be environmentally conscious. We teach them to treasure the Earth, and the animals and plants that live here with us. And at a very early age, your children are learning terms like "pollution", "recycle", "organic" and "earth-friendly".
Because of this early, environmentally-conscious outlook, kids tend to look at our planet in a rather protective way. Often even the youngest kids notice that factories, cars, and trucks put smoke and smog into the air we breathe. This activity helps your children become even more aware of what happens when pollution enters our air, and reinforces her love of the environment, which we all should share.

What You Need:

  • 3 1-quart jars with lids
  • Measuring cup
  • 3 small potted green plants
  • Vinegar or lemon juice
  • 6 labels or strips of masking tape
  • Pen or marker
  • Spiral or composition notebook
  • Pencil
  • Crayons

What You Do:

  1. Begin this activity by discussing with your children what some of the different uses of water are. Ask her why she thinks we need clean water. Be sure to remind her that we all need clean water not only for drinking and bathing, but also for growing the crops we use to feed ourselves and the animals that live on earth with us.
  2. Talk to her about the ways in which our air can be polluted. Give some examples of pollution she may have seen in your area, like the exhaust from your car or a factory on the side of the highway. Explain to her how pollution in the air travels up into the raindrops in the clouds in the sky. This means that our rain can become polluted too, which can sometimes lead to what is known as "acid rain." Note: There are many books that explain this concept as well if you would like to do some extra research! Perhaps you can read one these books and have this discussion with her as you read. (A great book to try is What Causes Acid Rain? By Issac Asimov)
  3. Next, explain that you are going to do an experiment that will show what acid rain does to plants. It will also show how important it is to have clean water for plants and animals.
  4. Before you begin the experiment, use your pen and the labels or masking tape to label each jar and each plant. Label the first plant and jar “a little acid”. Label the next plant and jar “a lot of acid”. Finally label the third jar and plant, “plain water.”
  5. Next, you will need to mix the water for the plants. Begin by explaining that the vinegar (or lemon juice) is an acid just like the acid that gets in the raindrops from the pollution in the air caused by the factories, cars, and trucks we have here on earth.
  6. Mix the water for the plant that will get “a little acid” by measuring ¼ cup of vinegar or lemon juice and placing it into the jar labeled “a little acid” and fill the rest of the jar with tap water.
  7. For the plant receiving “a lot of acid”, pour 1 cup of the vinegar or lemon juice into the jar and fill the rest with tap water.
  8. Fill the third jar, labeled “plain water”, just with tap water.
  9. Next, have her create her “Observation Journal" using the spiral or composition notebook. Label the first page with today’s date and have her draw a picture of each plant with each of their corresponding labels. You may want to have her write or dictate a sentence or two describing each plant’s appearance, which at this point should be the same for all three plants: green and healthy.
  10. Water each plant (being sure to use only about a 1/4 of the jar each time at the most) with the water from the corresponding jar containing either a lot of acid, a little acid or plain water.
  11. Every two or three days continue to water the three plants using the water from the original jars. Be sure to make note of and discuss which plant looks best. Which one looks the worst? How do the plants differ in color? Continue to have her record all of her observations in the journal by drawing and writing what she sees after each watering.
  12. Water and observe the plants for at least one week. Throughout the experiment, discuss the changes that have occurred in the three plants and ask her why she thinks the results turned out the way they did.
  13. At the end of the experiment, talk with her about which plant is the healthiest and which plant is the least healthy, working with her to reach a conclusion about what happened to the plants. Have her record all of her conclusions in her journal.
  14. Assist her in making the connection between this experiment and our own environment and the effects of acid rain in our world.
This experiment is not only interesting, but it's a simple way you and your children can explore the sometimes-complicated concepts of pollution and its environmental consequences. Along the way, you might even inspire her to get excited about making some "green" changes in her life!

Volcano Project

What You Need:

  • 1 tablespoon baking soda
  • Modeling clay (like Plasticine)
  • Newspaper
  • 3 drops red food dye (optional)
  • ¼ cup of vinegar
  • 3 drops liquid soap
  • Safety goggles

What You Do:

  1. Have your children help you cover your work surface with newspaper.
  2. Invite her to form a volcano shape out of the modeling clay. It should be about 6 inches high.
  3. If you have red modeling clay or paint available, use it for the volcano's top. Ask her to attach a bit to the tip of the volcano to enhance its appearance.
  4. Invite her to poke an opening in the volcano that's about 4 inches deep and 2 inches wide.
  5. Add one tablespoon of fresh baking soda. (Stale soda will not create a proper alkaline reaction!) If available, add 3 drops of red food coloring to the baking soda in order to enhance the eruption.
  6. Next, ask her to add 3 drops of liquid soap.
  7. Now, it's time for her to put on her safety goggles! Get ready to stand back.
  8. Finally, invite her to add the ¼ cup of vinegar, and see what happens! The reaction's sure to pique her interest in the science behind this volcanic activity.
What Happened?
The volcano “erupted” when the acidic vinegar came into contact with the alkaline baking soda, which neutralized it. The volcano then emitted carbon dioxide, which created the bubbles and popping noises.
An alkali, or base, will corrode surfaces. When combined with an acid, it forms a salt. Acids and alkalis are measured by the pH scale, with acids ranging between one and six, and alkalis ranging from eight to 14. Seven on the pH scale is pure water, which is devoid of either acidity or alkalinity.
Fun Volcano Fact:
What is the difference between lava and magma? Magma is underground liquid rock. As soon as magma shoots out of a volcano, it’s called lava!

Make Waves in a Bottle

What You Need:

  •  Clean bottle with cap
  •  Canola oil
  •  Water
  •  Food coloring (blue is a good choice for literal-minded kinders)

What You Do:

  1. Start by helping your kindergarten scientist pour canola oil into your bottle until it’s about ⅔ full.
  2. Help your children pour in enough water to fill the rest of the bottle. Add a few drops of food coloring, cap the bottle securely, and put the bottle on its side.
  3. Now swish the bottle back and forth, side to side. Look at what’s happening—there's an ocean in the bottle!
  4. As an extra option, consider making a little "boat" from a cork that fits through the top opening of your bottle. Watch how the cork bobs on the waves, just like a surfer or sailor.
Did You Know?
On our planet, waves happen when our earth spins on its axis and water is pulled by gravity across the geological formations of the ocean floor. When you move the bottle, you’re seeing energy move through the water to make waves, just like out in the deep blue sea!

Make Your Own Abacus!

What You Need:

  • Pencil
  • 9 craft sticks
  • 56 large pony beads
  • 8, 4-inch bamboo skewers (if yours are longer, you can cut them to the right length)
  • Wood glue

What You Do:

  1. Lay three craft sticks down so they are parallel. Use the pencil to draw eight matching lines on each stick, evenly spaced and centered across the length of the craft sticks.
  2. Take the bamboo skewers and align them with the pencil marks. There should be one craft stick at each end of the skewers. The third craft stick should be in the middle, about 1 inch away from one of craft sticks on the end.
  3. Put a thin line of glue on each of the pencil lines you've drawn.
  4. Carefully thread seven beads on each of the eight skewers. Place the skewers on the glue lines, arranging the beads so that two beads fall into the 1-inch space between the two closely-placed sticks and the other five fall into the larger space between the middle and end sticks. Let the sticks dry.
  5. Glue three craft sticks on top of the bamboo skewers so they line up with the sticks below, taking care to keep the beads divided. Let the sticks dry.
  6. Glue the last three craft sticks on top of the sticks you've just glued down. Let dry.
  7. Flip the abacus over so that the stacked sticks are on the bottom. Depending on the size of the beads, you may have to add more craft sticks to the bottom. The stacked sticks let the beads slide smoothly on the skewers and prevent them from scraping along the surface you're working on.
Now your children has a homemade abacus to practice important math skills! The abacus is a great tool to visually teach your children about addition, subtraction, multiplication, division, and even place value.

CLIL: Content and Language Integrated Learning


CLIL (Content and Language Integrated Learning) has emerged since the millennium as a major trend in education. Written by Do Coyle, Philip Hood and David Marsh and drawing on their experience of CLIL in secondary schools, primary schools and English language schools across Europe, this book gives a comprehensive overview of CLIL. It summarises the theory which underpins the teaching of a content subject through another language and discusses its practical application, outlining the key directions for the development of research and practice. This book acknowledges the uncertainty many teachers feel about CLIL, because of the requirement for both language and subject knowledge, while providing theoretical and practical routes towards successful practice for all.

English Language Teaching Materials: Theory and Practice


BUY IT

This volume presents a union of theoretical and practical pedagogical perspectives on materials design and development. This volume provides an incisive overview of the current state of materials design in language teaching. Seventeen original chapters explore the issues involved in the design, implementation, and evaluation of materials in language programs in a wide variety of settings and contexts. This stimulating collection considers different approaches to materials design - including teacher-developed classroom materials, commercial materials, and technology-driven materials. Discussion questions and tasks follow each chapter to make this volume useful to both prospective and practicing teachers alike.

Friday 19 May 2017

Activity: Change places, please

Materials: None.
Organisation: Whole class.
Aim: To listen and respond to requests and to make requests.
Description: This is a whole class activity which involves children changing places in response to cues.
Preparation: No preparation is needed for this activity.

Procedure:

1. Put all the chairs in a circle facing the middle. There should be chairs for all the children but not one for the teacher.

2. Stand in the middle of the circle of chairs and nominate two children to change places (for example, ‘Marco and Anna, change places please’)


3. When the children are used to moving around, say a sentence such as ‘If you have brown eyes, change places’. The children who have brown eyes get up and try to sit in another chair. While the children are moving, the teacher tries to find a chair. Someone will be left without a chair and this child then makes the next ‘change places please’ sentence.

4. At the end of the game, say ‘there will only be one more sentence’. At this point, the child who is in the middle can say, ‘If you are a teacher, change places, please’ making sure that the teacher always loses the game!


Notes: This activity is a great deal of fun but it also has the potential to be quite chaotic. Children love it but do be careful to avoid minor accidents!

Alternatives:


• This game can be played in big groups if the children sit on the floor.

• The game can be played with low level children and simple vocabulary. For example, you can give the children names of fruits: four children are bananas; four apples; four mangos; four peaches; four melons and so on. The teacher is also a fruit. The teacher starts by saying ‘bananas and mangos’ and those children have to change places. To make it even more fun, you can introduce ‘fruit salad’ and all the children have to change places.